|
Download this file in: |
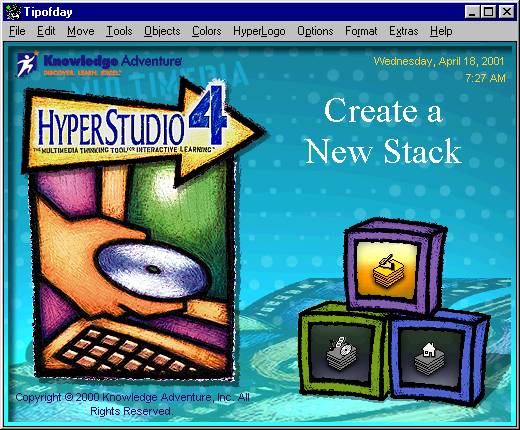
Start the HyperStudio program. On
the opening screen, click on the “Create a New Stack” icon.
Click
“Yes” in the next window.

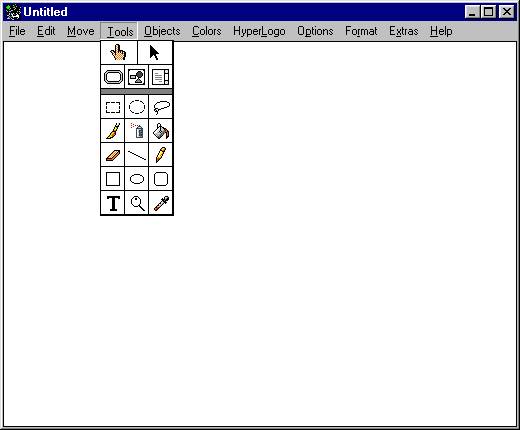
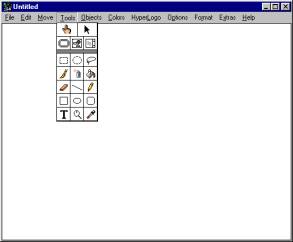
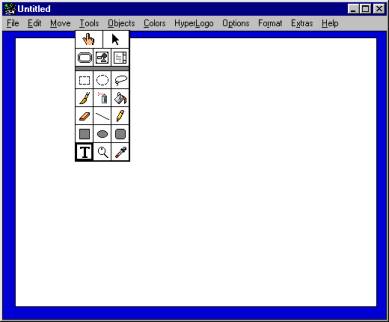
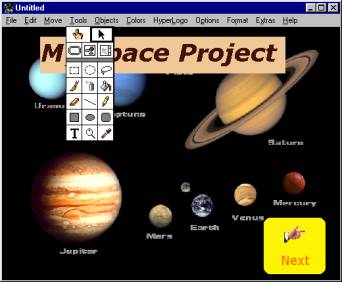
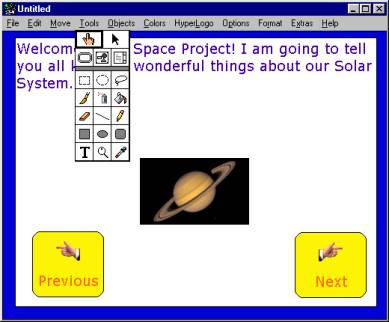
You now have a blank card to work on. Click on “Tools” on the menu bar. These are the tools you will be using to add text, drawings and shapes to your project.
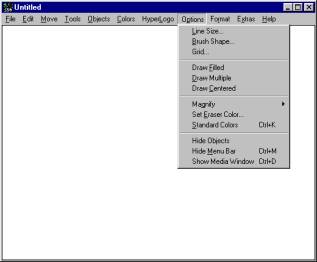
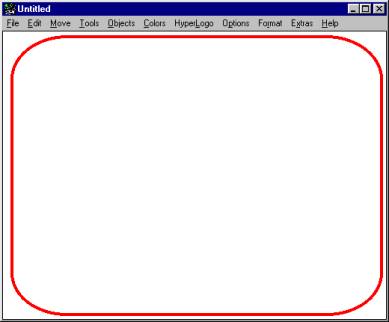
Let’s start by putting a border around
your card. Click on “Options” on the menu bar, and select “Line Size”.
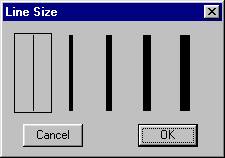
Select a line size (thickness), then click OK.
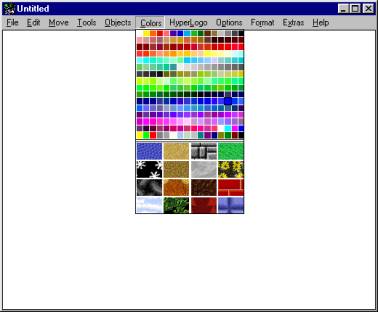
Click on “Colors” on the menu bar, and select a colour for your border.

Click on “Tools” on the menu bar, and select a shape for your border.
Place
your crosshair at the top left corner of your card and draw a border.
If you don’t like the border you’ve drawn, click on “Edit/Undo Painting”. Your border will disappear, and you can try again.

Instead of selecting a line size
and colour for your border, you can choose a fill colour for the background.
After choosing your line size from the “Options” menu, choose “Draw Filled”.
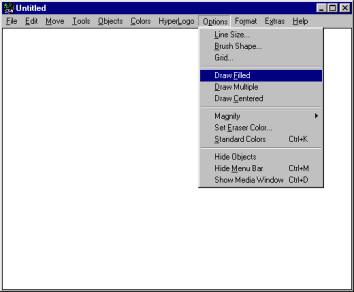
Select “Colors” from the menu bar, and choose a colour for your bordered area.

Draw your border as described above. If you don’t like the colour, you can change it by selecting “Edit/Undo Painting” from the menu bar.
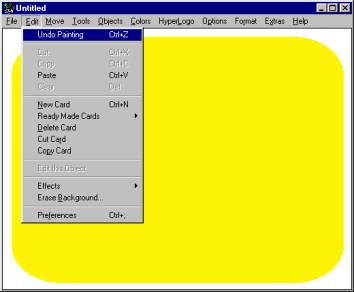
Go
back to “Colors” on the menu bar, and select a new colour.
Redraw
your border; it should now be filled with the new colour.
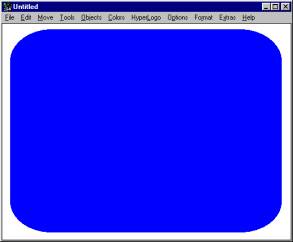
If you would rather have a background that covers the whole card, you can choose a solid colour fill, or you can use an image.
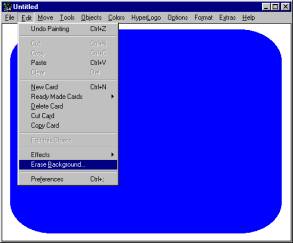
To use a solid colour fill, select “Edit/Erase Background” from the menu bar.
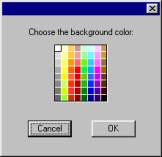
You will be presented with the colour palette; select a colour, then click OK.
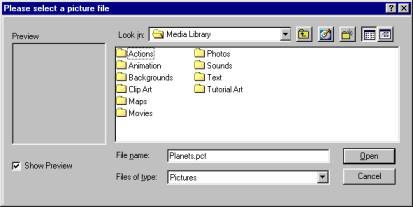
If you want to use an image as a background, select “File/Import Background” from the menu bar.
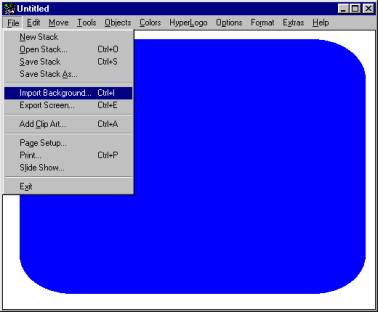
Choose “Disk File” in the next window, and click OK.

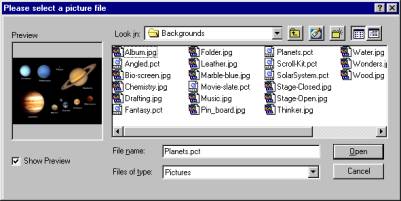
You will be presented with a window showing the picture files available in the HyperStudio Media Library. Double-click on the “Backgrounds” folder.
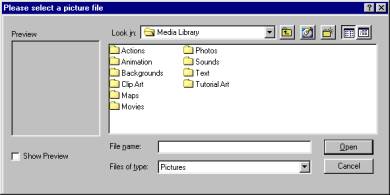
Put
a check in the box beside “Show Preview”.
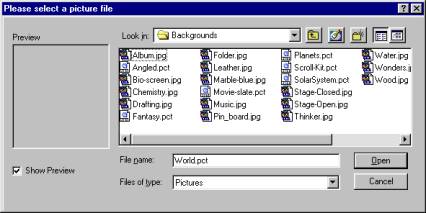
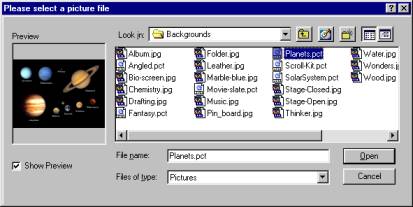
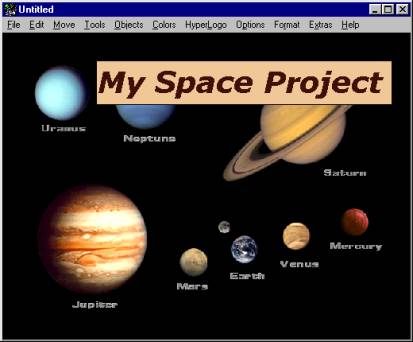
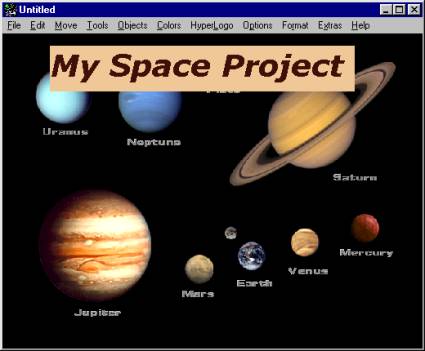
Click once on a file name to see a preview of the background. In this case, I have chosen “Planets”.
Other images suitable for backgrounds are in the “Clipart” and “Maps” folders.
When
you have chosen a background, click “Open”.
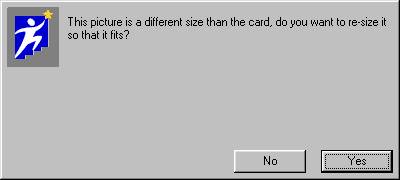
Click “Yes” in the window that appears, asking you if you want to resize the image to fit the card.
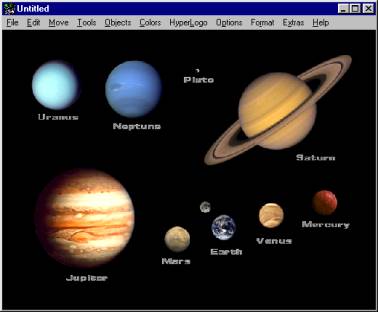
My card now appears with the new background.
You can use any image that you may have on your computer, since HyperStudio supports most common image formats.
Now it’s time to add some text. Select “Objects/Add a Text Object” from the menu bar.
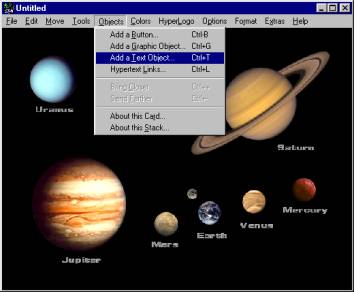
This will place
a text box on your card.
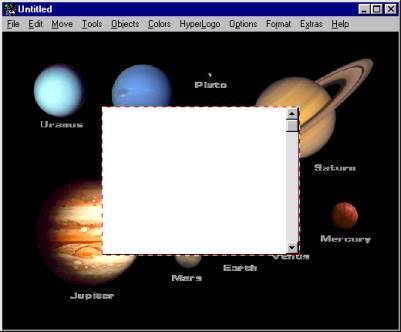
You can move the box around the card when your cursor becomes a four-headed arrow. Hold down your left mouse button and drag the box to where you want it. You can also resize the text box by putting your cursor over the bottom right-hand corner until you see a double-headed arrow. Hold down your left mouse button and drag to resize the box.
Place your cursor inside the box, then double-click using your left mouse button. A window showing the properties of the text object (text box) will appear.
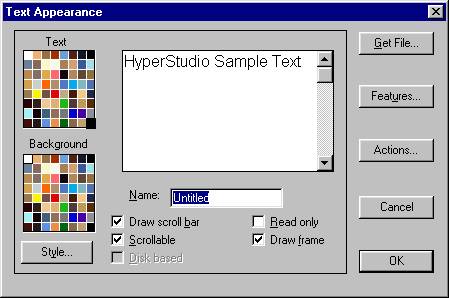
There are a number of properties that you can select, but for now, let’s concentrate on Text Colour, Background Colour and Text Style.
In the Text colour palette, select a colour for your text, keeping in mind the colour you are going to choose for the background of the text box.
In the Background colour palette, select a colour for the background of the text box.
Notice that your changes appear in the window, allowing you to see what they will look like.
Finally, click
on the Text Style button. In the next window, you can choose a font, size and
style for your text. You can also readjust your text and background colours.
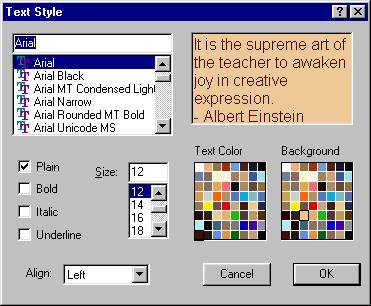
When you have made all your choices, click on OK.
I
have chosen black for the text colour, light brown for the background, and I
have put the text in 28 point Verdana, bold and italic. Click OK.

Type
the text that you want inside the text box.
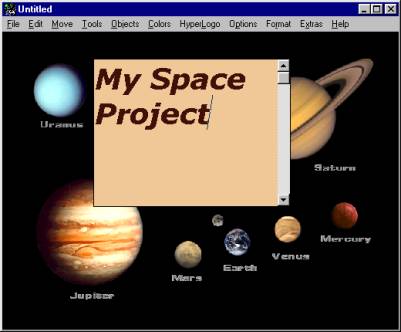
Because
I don’t have much text, I want to resize the box and remove the scroll bar on
the right side. The scroll bar is only necessary when you have more text than
the text box can display; the reader can use the scroll bar to scroll down and
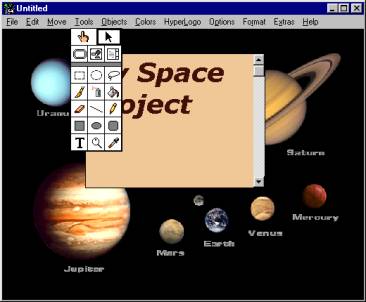
see the rest of the text. To make these changes, select “Tools” from the menu
bar, then select the arrow (pick) tool.
Move your cursor inside the box until you get the four-headed arrow. Then double-click with the left mouse button. The Text Appearance window will appear.

Take the check marks out of the “Draw Scroll bar” and “Scrollable” boxes. Add a title for your text box, if you wish.
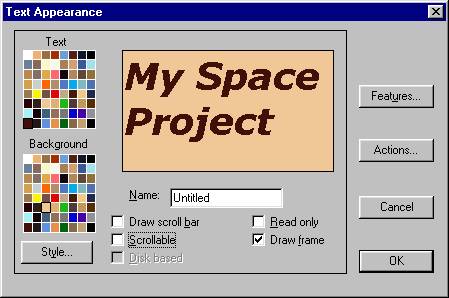
You can also choose to have a frame around your box, or to have it appear with no frame. Click OK.
Now
we’ll resize the box to fit the text.
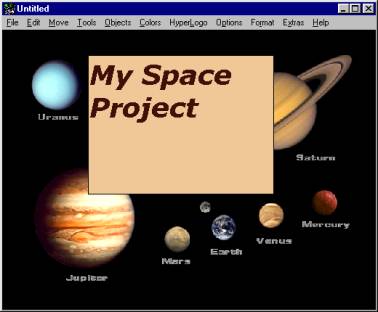
Move your cursor to the bottom right-hand corner of the box until you see the double-headed arrow. While holding down your left mouse button, drag diagonally and upwards until the box frames the text the way you want it.
Release the mouse button and click anywhere away from the text box. To position the text box on the page, click inside the box with your left mouse button, hold down the button, and drag the box to its new position.

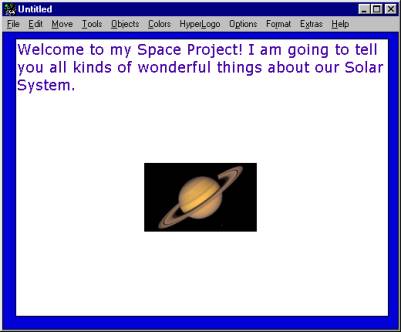
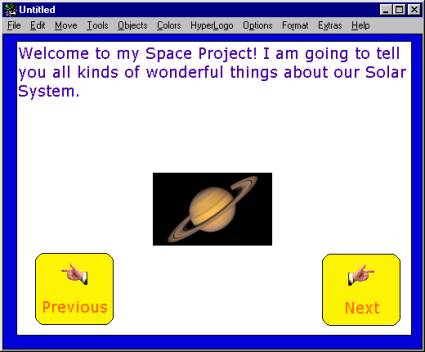
Here
is how it would appear without a frame:

You have now completed the first card (page) of your stack.
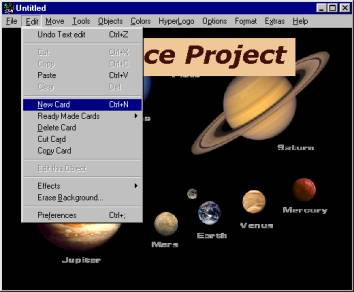
Let’s add a second card. Select “Edit/New Card” from the menu bar.
I have created a new card, added a blue background, and a text box with a white background, resized to take up most of the card space, using the procedures outlined earlier, when we created our first card. The text is in Verdana 14 point, in a dark blue.
To begin adding text, select “Tools” from the menu bar, then select the “T” (text) tool.
Place your cursor at the top left corner of the text box, then start typing your text.

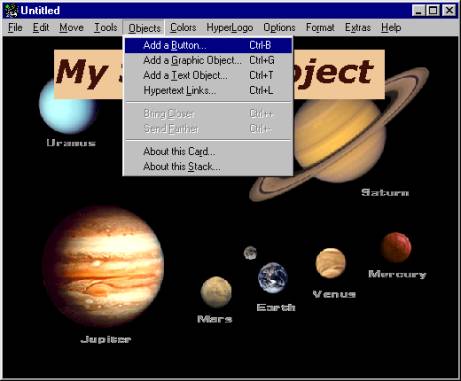
How about adding a picture of a planet?
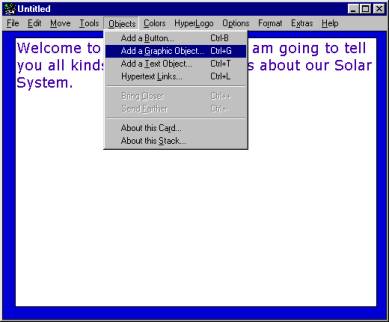
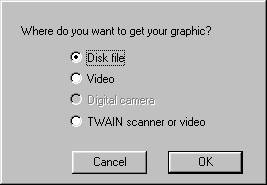
Select “Objects/Add Graphic Object” from the menu bar.
Select “Disk file”, then click OK.
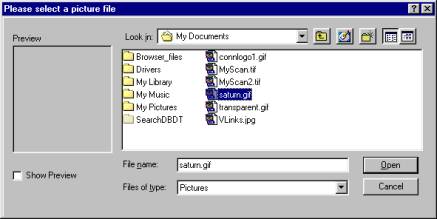
I have saved a picture called
“saturn.gif” in the “My Documents” folder. Select your picture file and click
“Open”.
Select the Crop tool.

While holding down your left mouse button, place the crosshair at the top left corner of the picture and drag a box around the section of the picture you want to insert into your card. Let your mouse button up and click OK.

The picture will appear on your page, with a moving red line around it.
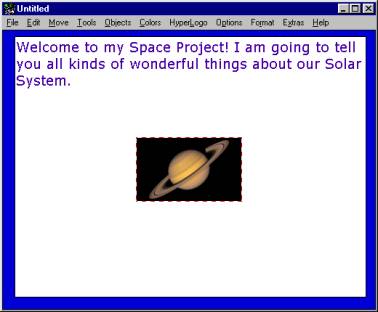
Move your cursor over the picture; when the four-headed arrow appears, you can drag the picture to another location if you wish. Click anywhere away from the picture when you are satisfied.
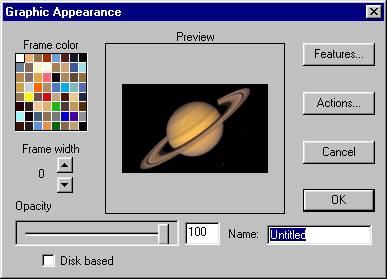
In the next window, you can make some changes to the way your picture appears, such as putting a frame around it. Click OK when you are finished.
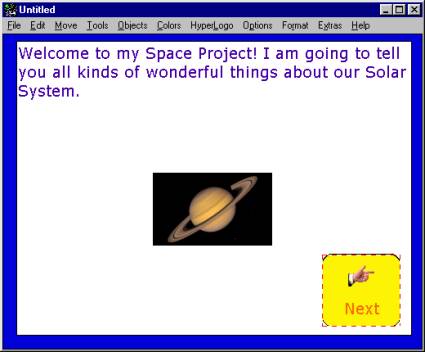
Now that we have created a simple two-card stack, we need to navigate between the two cards. Select “Move” from the menu bar.
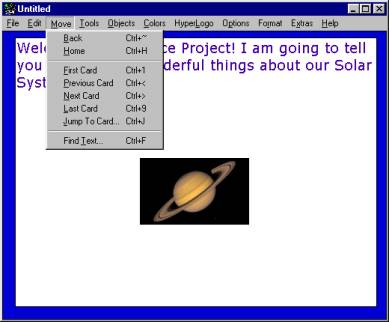
Note that you can select which card to jump to. In this case, we want to go back to our first card. Select “Previous Card”.
Your first card will now appear:
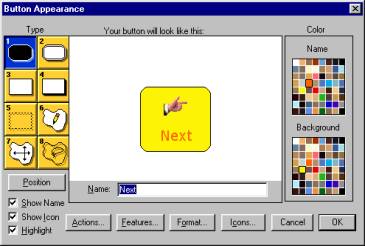
Select “Objects/Add a Button” from the menu bar.
A “Button Appearance” window will appear.
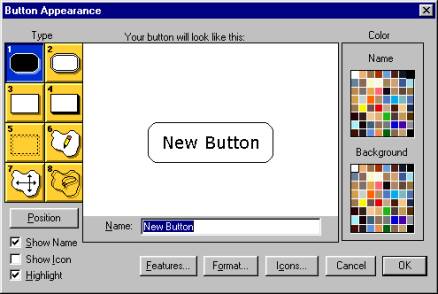
A sample default button will appear. There are a number of different shapes and attributes available to configure your button. We’ll accept the default shape, but change some of the other options. Begin by typing a name for the button. Since this button will take us to our second card, we’ll name it “Next”.
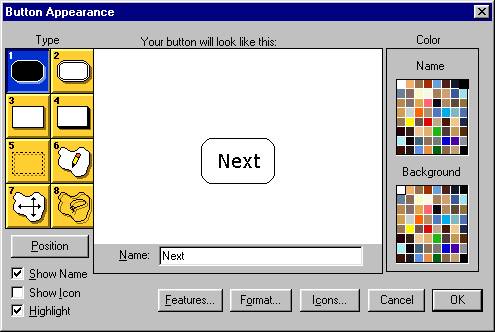
We
can change the text colour by selecting a new colour from the “Name” colour
palette.
We can change the background colour of the button by selecting a new colour from the “Background” colour palette.
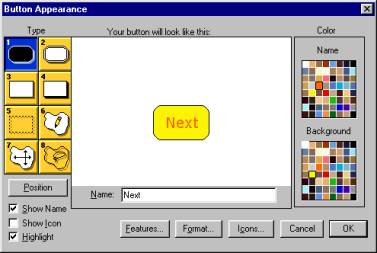
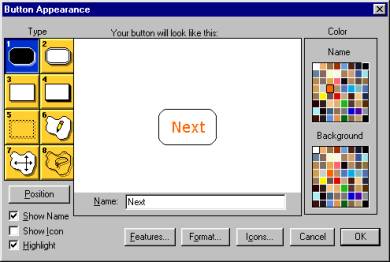
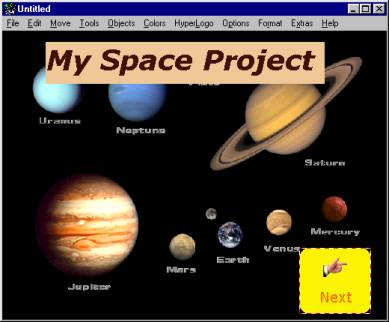
Your
new button will look like this:
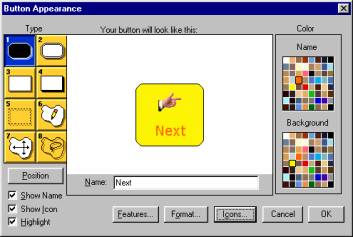
Click OK.
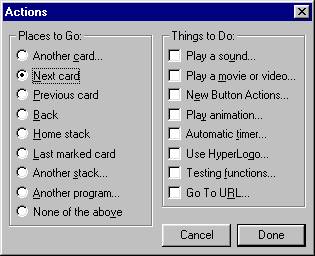
We can now tell the button what we want it to do. Select “Edit” from the menu bar: you will see the following window.
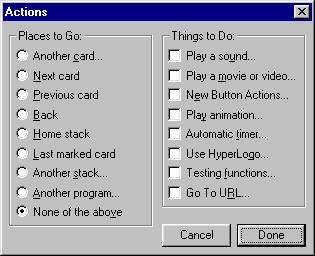
Since we want to move to our second card when this button is clicked on, select “Next card”.
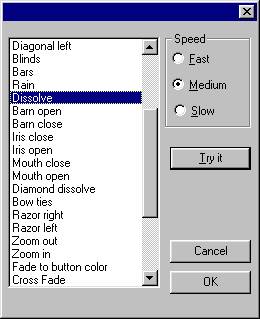
In the next window, we can select
the transition (the way we want the second card to appear). Select a transition
effect and a speed, then select “Try it” to preview.
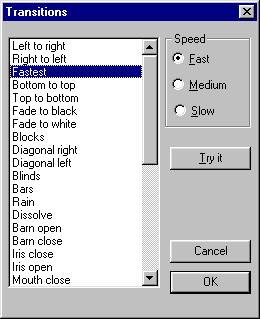
Play
with different options until you are happy with it. Click “OK”.
Click
“Done” in the next window.
Before testing your button, let’s move it to a more appropriate place on the card. Select “Tools”, then select the arrow (pick) tool.
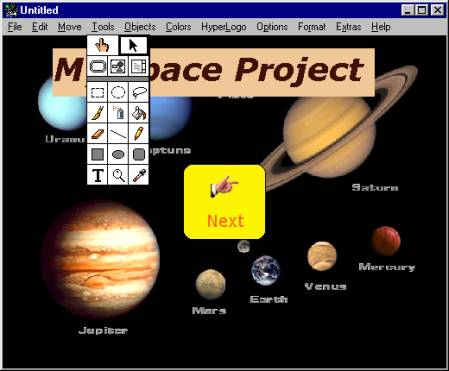
Move
your cursor over the button; it will change to a four-headed arrow. Hold down
your left mouse button and drag it to where you want it.
Click
anywhere away from the button. Select “Tools” from the menu bar, then select
the Browse tool (the hand icon).
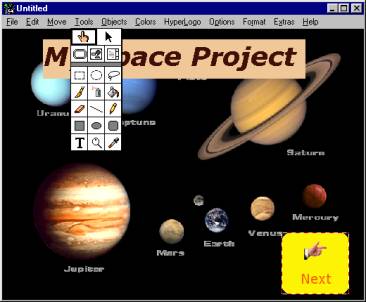
Move the hand over the button and click once. Your second card should appear, using the transition effects you chose earlier.
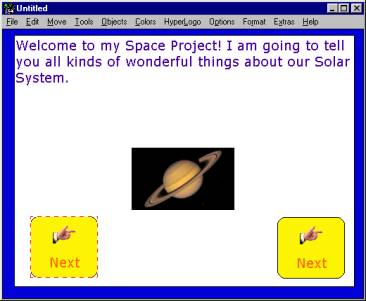
This card will need two buttons, assuming that you will be adding more cards to your project later on. One button will take us back to the first card, and the other will take us forward to the previous card. Rather than re-creating each new button individually, using the procedure above, we can simply return to the first card (select Move/Previous Card from the menu bar), and copy the button you created .
To
do this, select Tools, then the arrow (pick) tool.
Move
your cursor over the button and click once. A dotted line will appear around
the button.

Select “Edit/Copy button” from the menu bar (or press Ctrl-C on your keyboard). Move to the second card (Move/Next Card on the menu bar). Select “Edit/Paste button” (or Ctrl-V on your keyboard). The copied button will appear on your card.

Note that it appears close to where it was on the first card. You can put your cursor over it and move it if you wish. This button will link to the next card you will be creating later. We still need a button to link back to the previous card. Since our copy is still on the Windows Clipboard, we can simply do an “Edit/Paste button” to make another copy.
Note that the copy appears in the same location, but has the dotted line around it.
Move your cursor over the button and drag it to the left side of the card.
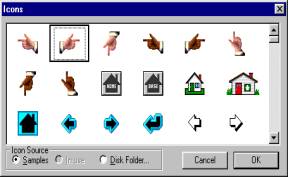
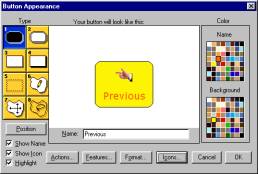
Since we want this button to link back to the previous card, we need to change its properties. Move your cursor over the button and double-click. The “Button Appearance” window will appear.
Type a new name for the button
(in this case, “Previous”). We also need to change the icon. Click on the Icons
button and select “Samples” at the bottom of the window. Select the left pointer
icon, then click OK.
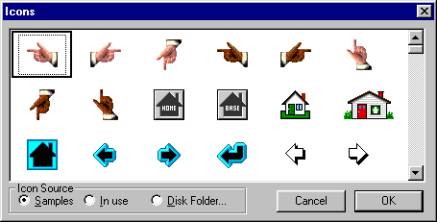
Now click on “Actions”.
Select
“Previous Card”.

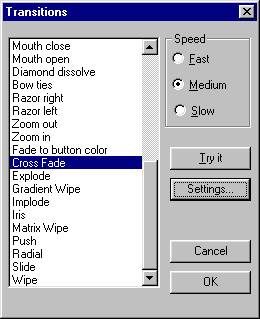
Select a transition effect and speed as you did earlier; you can choose a different one or keep it the same. Click OK.
Click “Done” in the next window.
The
new button will now be ready to use.
To test how your project works, return
to Browse mode by selecting “Tools” from the menu bar, then selecting the Browse
tool.
Move your cursor over the “Previous” button and click. You should be returned to your first card.
Click
on the “Next” button to move to your second card.

We have now created a simple two-card stack using some of the basic features of HyperStudio. In the next workshop, we’ll look at using some more advanced features, such as adding sounds (both pre-recorded sounds and those that you can record yourself), using the Painting and Drawing tools, using animation, adding movies, creating hyperlinks to Web sites and other documents, and installing and using the HyperStudio Viewer and HyperStudio web browser plug-ins.
© Chris Taylor
North Island Distance Education School